Showing posts with label Bread. Show all posts

Wednesday, February 1, 2012

Cheddar Bay Biscuits

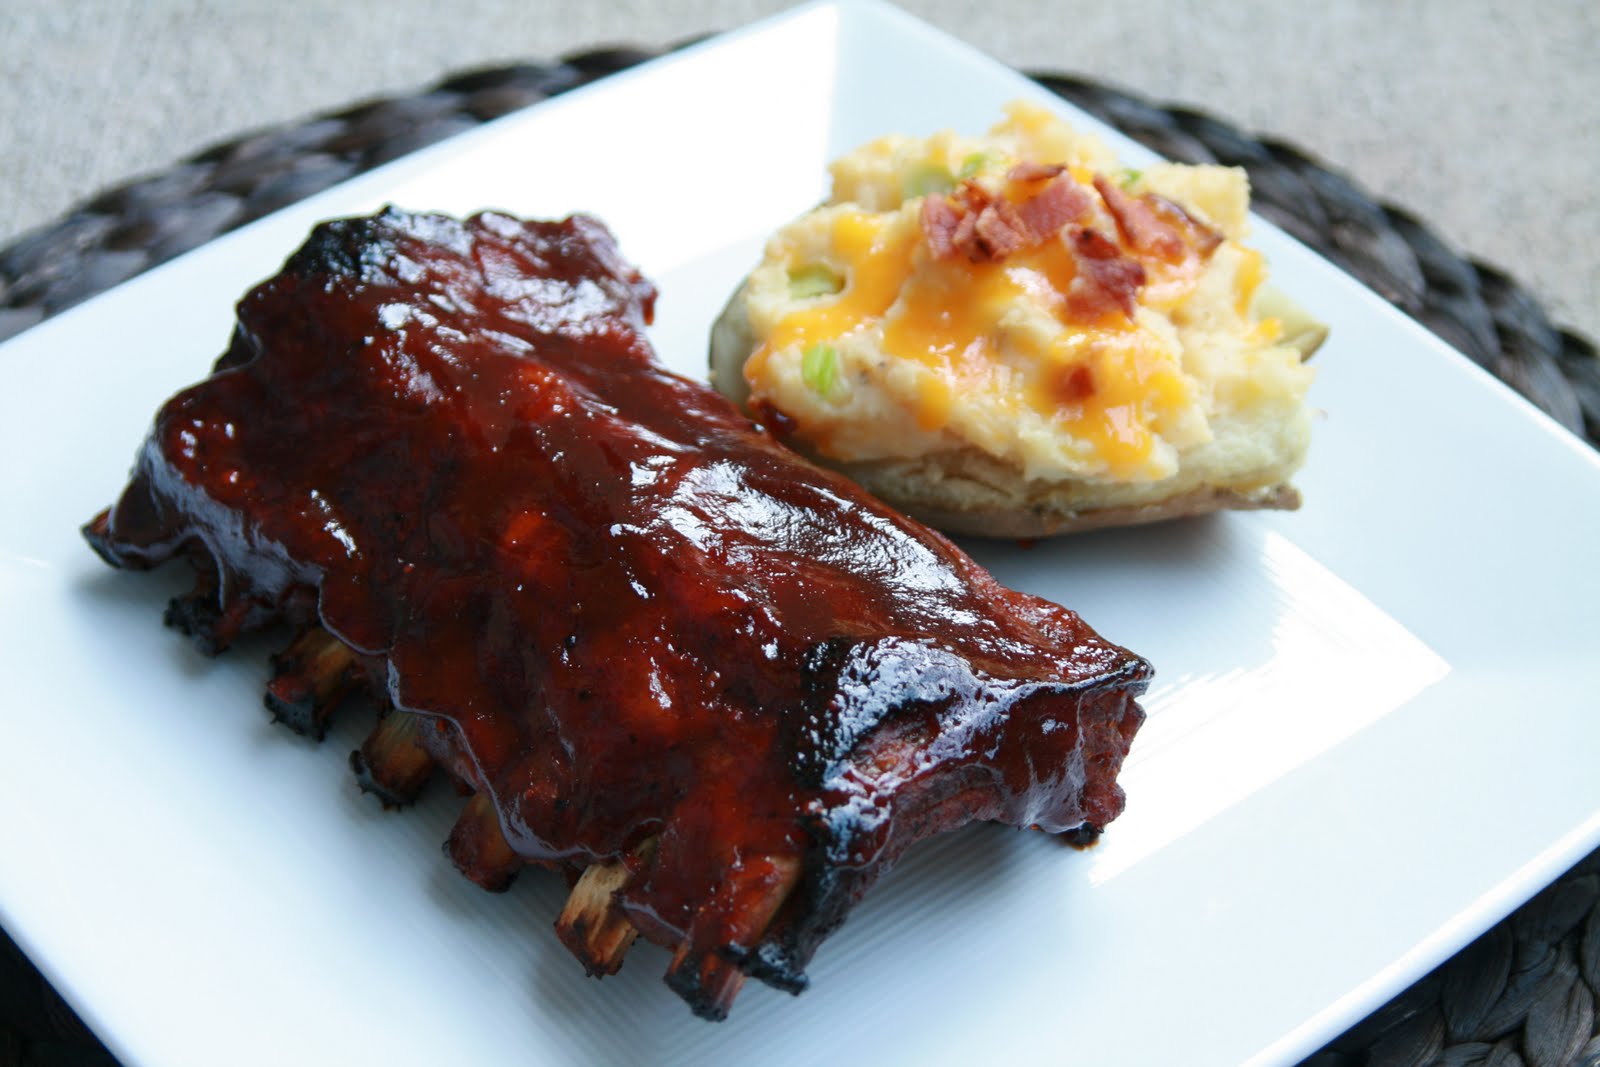
I don't know if you've noticed, but I'm not much of a seafood fan.  I so wish I was, because lets be honest, it can be really healthy and good for you!  One of my New Years Resolutions though was to try new things this year and cooking Seafood is definitely one of them!  So, needless to say, you should be seeing some seafood dishes hopefully in the near future.  (if you all have any recommendations on what type of fish is your favorite and how to cook it, I will definitley take anything you've got!)

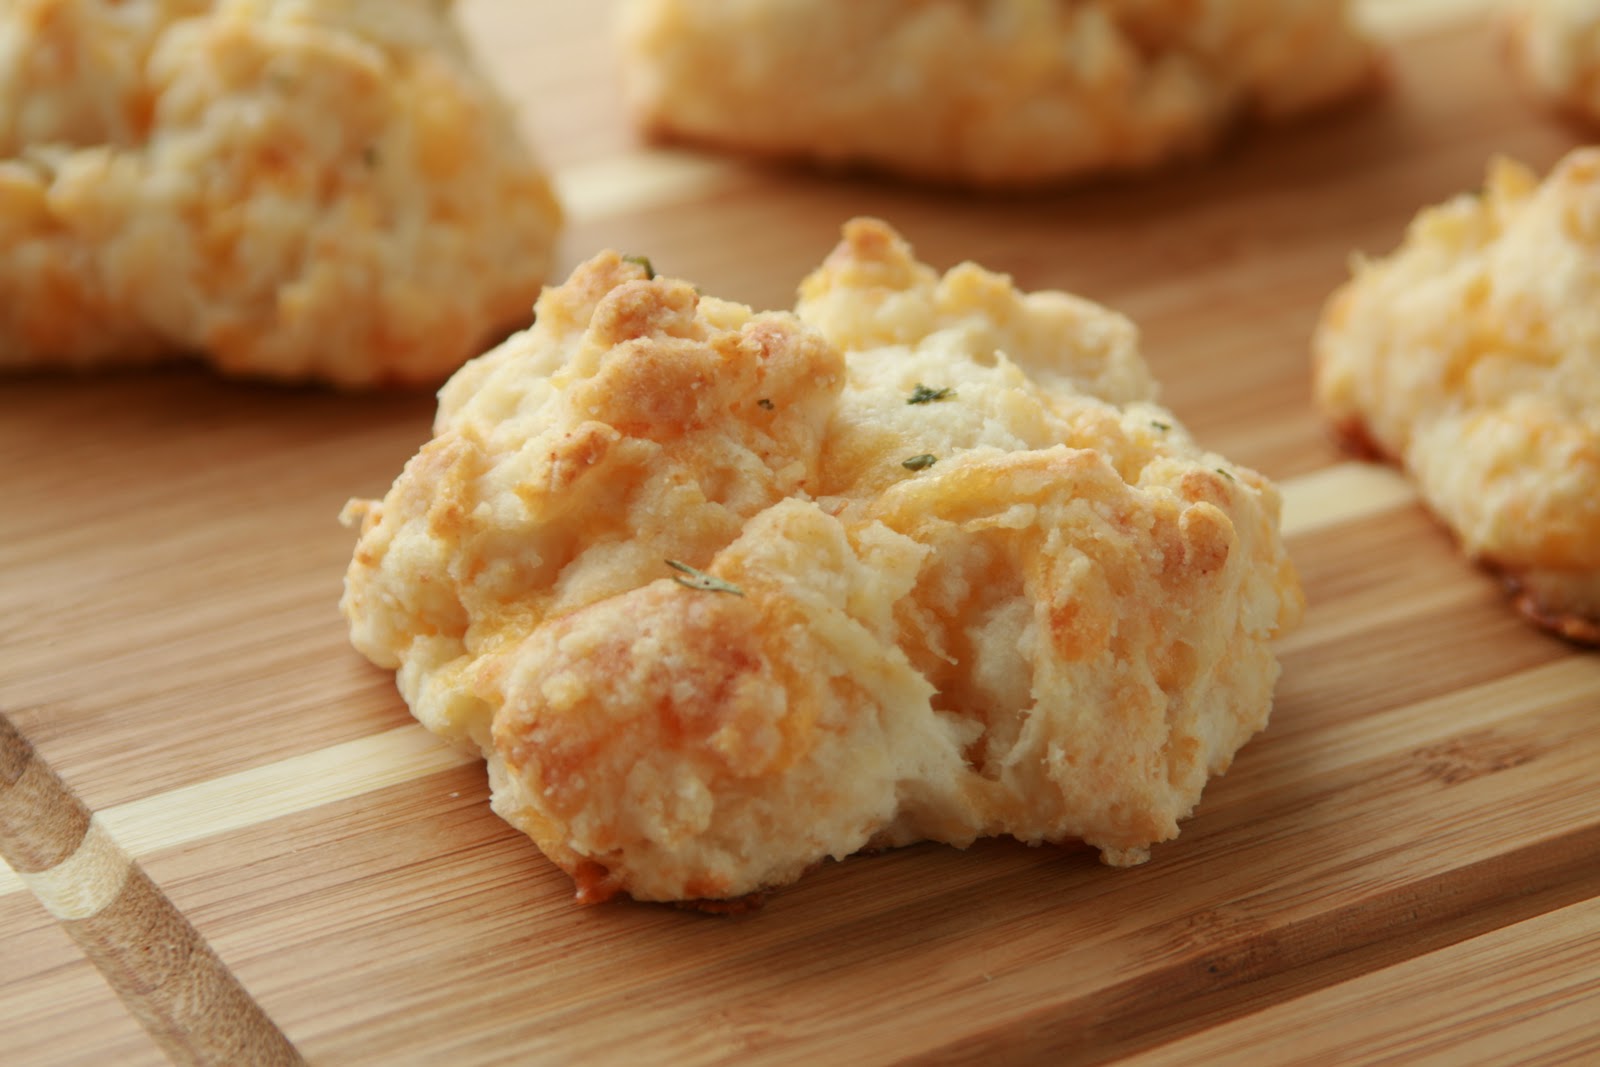
Anyways, so the reason I even babbled about all that seafood jibberish is because I LOVE Red Lobsters Cheddar Bay Biscuits.  I don't eat there very often because of my fish disliking, but I crave these biscuits on a regular basis.  They are so full of flavor and they can be paired with so many different meals.  These biscuits are so simple to put together that I'm sure you will find yourselves whipping these up more often that you think :)


Recipe:
2-1/2 cups Bisquick
4 Tbsp. cold butter
1 cup Shredded Cheddar Cheese
3/4 cup milk
1/4 tsp. garlic powder

For the Butter Topping:
3 Tbsp. Butter (melted)
1/2 tsp. garlic powder
1/4 tsp. dried parsley flakes
pinch of salt

Preheat your oven to *400.  In a large bowl, using a pastry blender (or a fork) cut the butter into the bisquick till the mixture becomes crumbly.  Using your hands mix in the cheese, milk, and garlic powder till well incorporated but DO NOT overmix. 

Drop spoonfuls of batter about 1/4 cup in size onto a parchement or silicone lined baking sheet.  Bake for 13-17 minutes until lightly browned on top.

Right before the biscuits are done baking, melt your butter, then combine all the seasonings into the butter.  Right when the biscuits are done, brush a generous amount of the garlic butter over the top of each biscuit.   Makes a dozen biscuits.  Enjoy!

Recipe Source: Top Secret Recipes


Thursday, June 30, 2011

Oven Baked Ribs and a Festive Dessert Perfect for the 4th of July.

Who ever knew that Baby Back Ribs could be so easy and SO Delicious!  These were so easy to make that I think I just might whip some more of these up for the holiday this weekend.  Since we live in an apartment right now, and do not currently have a grill right outside our back door, these brought the flavor of the grill that I was looking for and INSIDE the comfort of my home.  I served our ribs with twice baked potatoes that were equally just as delicious! They paired perfectly together.

Now if you are looking for a great dessert for the 4th of July, well, look no further because this strawberry shortcake is so tasty and Oh so Festive!

Recipe for the Ribs:

1 rack of Baby Back Ribs
1 Tbsp. of Weber Smokey Mesquite Seasoning
1 (18oz) bottle of Sweet Baby Rays hickory Brown Sugar Bbq Sauce 

Place the rack of ribs in a 9x13 baking dish.  Sprinkle the ribs with the Weber Seasoning.  Pour half of the bottle of bbq sauce over the ribs and cover the dish tightly with tin foil and place in the oven @ *400 and bake for 90 minutes.  When the 90 minutes is up remove the foil, pour the remaining bbq sauce over the top of the ribs, and place back into the oven and bake for 15 more minutes.  Serve with twice baked potatoes or a green salad.

For the Red White & Blue Strawberry Shortcake:
For the Shortcakes/Biscuits: (*Note if you just want biscuits only use 1 Tbsp. sugar)
2 cups Flour
4 tsp. Baking Powder
3 Tbsp. Sugar
1/2 tsp. salt
1/2 cup butter
3/4 cup milk
1 egg

For the Cream:
1 pint of heavy Cream
2-3 cups of powdered sugar
1 tsp. Vanilla Extract
1 container of blue food coloring

Combine all of the dry ingredients together in a large bowl.  Using a pastry cutter, cut in the butter till the mixture becomes crumbly.  Beat together the egg and the milk and stir into the dry ingredients and stir till barely blended.  Drop 3-4 Tbsp. of the dough onto a lightly greased or lined baking sheet.  Bake @*400 for 10-12 minutes or until the tops are lightly browned.  Let cool completely before arranging the shortcakes.

Beat together the heavy cream, vanilla, powdered sugar, and blue food coloring till stiff peaks form.

Take the cooled shortcakes and slice them in half.  Layer the cream, then strawberries, then the other half of the biscuit, and then top off with another dollop of cream.  Enjoy!

I hope you all have a Wonderful 4th of July weekend!!! 


Monday, June 20, 2011

Cinnamon Rolls

I hope you all had a wonderful Fathers Day weekend!  We enjoyed Fathers Day so much because we got to hang out with The Hubs ALL DAY on Sunday! He works so hard all week that it was nice to be able to just focus all day on him!  It was so nice! 
I attempted to be a good wife and make him homemade cinnamon rolls for breakfast (which until then, I had never made homemade rolls before) but with this great and easy recipe from The Girl Who Ate Everything they turned out great!  There really is nothing like waking up to the whole house smelling of cinnamon goodness and eating a warm and comforting cinnamon roll! :)


Recipe:
1 cup warm milk 
2 eggs, room temperature
1/3 cup butter, melted
4 1/2 cups bread flour or regular flour (bread flour makes for a lighter cinnamon roll)
1 teaspoon salt
1/2 cup white sugar
1 pkg yeast (1/4 ounce)


Filling:
1 cup brown sugar, packed
2 1/2 tablespoons ground cinnamon
1/3 cup butter, softened


Icing:
3 oz cream cheese, softened
1/4 cup (4 tablespoons) butter, softened
1 1/2 cups confectioners' sugar
1/2 teaspoon vanilla extract
1/8 teaspoon salt


Microwave milk for 45-60 seconds in the microwave. Dissolve yeast in warm milk in a large bowl. Add sugar, butter, salt, eggs, and flour. Mix well. Knead dough into a large ball, using your hands dusted lightly with flour. Put in a bowl sprayed with cooking spray and cover tightly with plastic wrap. Let rise in a warm place about 1 hour or until dough has doubled in size. *Our house is so cold I have a hard time getting things to rise. If I turn on the oven and then put the rolls on top of the stove, the oven generates enough heat for them to rise.


In a small bowl, thoroughly combine brown sugar and cinnamon. Spray surface with cooking spray or sprinkle flour on it. Roll dough into a 16x21 inch rectangle about 1/4 inch thick. Spread dough with 1/3 cup softened butter and sprinkle evenly with sugar/cinnamon mixture. Roll up dough starting with the longer side and cut into 12 rolls (or more smaller rolls). Place rolls in a lightly greased 9x13 inch glass baking dish. Cover and let rise until nearly doubled, about 30 minutes. *After this I would put them in the refrigerator for the next morning if you are doing them the night before.


Meanwhile, preheat oven to 350 degrees. Bake rolls in preheated oven until golden brown, about 18-20 minutes. While rolls are baking, beat together cream cheese, butter, confectioners' sugar, vanilla extract and salt. Spread frosting on while they are still warm so that the frosting melts into the roll. 

(Recipe SourceThe Girl Who Ate Everything)

Tuesday, May 31, 2011

French Baguettes

We had so much fun over the weekend. We went to a movie at a Studio Movie Grill where you literally order your meal right at your seat. I got the best coconut chicken strips and a frozen hot chocolate and I have been dreaming about them both ever since! We also went to the beach for the first time this year being in Houston and Lily absolutely loved it! She was walking up and down the beach like she owned the place.  It was pretty funny.


Alright now for the recipe. I didn't do much cooking over the weekend like I thought I would, but I did make some really yummy french bread from a great recipe book that my mother-in-law introduced me to.  It's called The Food Nanny, and I just have to say that it has become one of my favorite recipe books! She has so many helpful hints like how to purchase and plan out your meals for 2 whole weeks (which I definitely still need to work on!) and she has so many great recipes that are pretty simple to throw together too!

One of my favorite recipes from her book has definitely been her French Baguette recipe.  It is so easy to make and tastes oh so good! I don't know if many of you out there are super intimidated to make bread like I was, (kinda still am) if so, I highly suggest starting out with this recipe. I felt that it was pretty easy and the results have always been very pleasing.

Recipe:
1 1/2 cups warm water, divided (105-115 degrees)
1 1/2 Tbsp. active dry yeast
2 tsp. Sugar, divided
3 1/4 cups all purpose unbleached flour
2 tsp. Salt
Couple Tbsp. of melted butter for brushing on loaves

In a small bowl, combine 1/2 cup of warm water, yeast, and 1 tsp. of the sugar. Stir just to combine then cover for about 5 minutes or until the mixture becomes bubbly or foamy.

In a large mixing bowl (I use my kitchen aid for the rest) blend the flour, salt, remaining tsp of sugar, and the yeast mixture.  Gradually add water, up to the remaining 1 cup of water, and mix till the dough forms a ball that is smooth and not too sticky. (If the dough is still just a little to sticky then mix in just a little more flour. I have never had to add more flour cause I knead in a little) 

Turn the dough onto a lightly floured surface and knead till the dough is smooth and elastic. Cut the dough in half and shape each piece into the shape of a baguette.  Place the dough into greased dough pans (available at kitchen stores) (if you don't have bread pans then place them side by side on a silicone lined baking sheet, you will see this in my picture).  Make a shallow cut into each loaf then cover and set aside allowing the bread to raise for 30 minutes. The loaves should double in size when done raising.

Cut the dough in half
Make shallow cuts in both loaves
Preheat the oven to *450 and place a shallow pan of water on the lowest rack in the oven to create steam. (This helps the bread to have a nice crisp crust.) Bake for 15 minutes or until the bread makes a hollow sound when tapped with a knife. Halfway through baking brush melted butter over the top of each loaf. Or if you would prefer a softer crust, brush with butter when completely done baking.

(recipe source: The Food Nanny Cookbook)


Tuesday, May 24, 2011

Frosted Banana Bars

Many of you have probably had or even tried bars similar to these ones, but you know what, well, you can never have to many banana bars or be reminded of making them again. Cause lets be honest, we all have those brown bananas sitting on our counter tops just screaming at us to make these delicious bars or even this delicious bread.

Recipe:
For the Bars:
1/2 cup butter (softened)
2 cups Sugar
3 eggs
1-1/2 cup mashed banana (about 3 ripe bananas)
1 tsp. Vanilla Extract
2 cups All Purpose Flour
1 tsp. baking soda
Pinch of salt

For the Cream Cheese Frosting:
1 (8oz) pkg. of cream cheese
1/2 cup butter (1 stick softened)
4 cups Powdered Sugar
2 tsp. Vanilla Extract

In a large bowl, cream together the butter and sugar till light and fluffy. Mix in the eggs, bananas, and vanilla. Combine the flour, salt, and baking soda and stir into the creamed mixture just until blended.  Now take a greased (I like to use Bakers Joy for this dish) 15-inch x 10-inch x 1-inch jelly roll pan and lightly sprinkle cinnamon and sugar on to the bottom of the greased pan. Now pour the batter onto the pan and Bake @ *350 for 18-22 minutes. 

For the Frosting, cream together the cream cheese and butter. Slowly mix in the powdered sugar and vanilla. Spread over the cooled bars and serve.  Makes about 3 dozen bars.

(Recipe Source: The Sister's Cafe)


Tuesday, May 3, 2011

Banana Bread with a Streusel Topping

Growing up I was never a fan of banana bread.  I thought those little brown speckles that you see throughout the bread were bugs, Gross I know! Now your thinking why on earth would I want to make Banana Bread??!!?  But let me just tell you, I grew up, my taste buds and senses have majorly changed, I realized those speckles were only the center of the banana, and I have come to realize that I LOVE banana bread!  I took this recipe and added a lovely streusel topping and I love it even more.  This would be a lovely recipe to whip up this weekend for a mothers day breakfast/ brunch. 

Recipe:
For the Bread:
1 1/4 cups sugar
1/2 cup Butter (softened)
2 eggs
1 1/2 cups Ripe Banana (mashed) (about 3 medium bananas)
1/2 cup Buttermilk
1 tsp Vanilla 
2 1/2 cups Flour
1 tsp. Baking Soda
1 tsp Salt

For the Streusel Topping:
1/2 cup Brown sugar
1/2 cup Flour
1/4 cup Granulated Sugar
1/2 tsp. Cinnamon
1/4 cup Walnuts chopped (optional)
5 Tbsp. Butter (chilled) (diced)

Preheat the oven to *350.  Lightly grease 2 loaf pans.  Cream together the butter and sugar.  Add in the eggs one at a time until well combined. Next, add in the mashed bananas, buttermilk, and vanilla.  Beat till smooth.  Combine the flour, baking soda, and salt together. Slowly add it into the creamed mixture just until moistened.  Pour into the prepared loaf pans and bake for 40 minutes.

For the streusel topping, combine all the ingredients except for the butter. Next using a pastry blender, cut in the butter until the mixture forms into a crumbly substance. Pour over the baked banana bread and place back into the oven and bake for 20 more minutes or until a toothpick comes out clean.

This banana bread will store for up to 4 days at room temperature or up to 10 days in the refridgerator.

(Recipe Source: Slightly adapted from Sisters Cafe)

Thursday, March 3, 2011

Blueberry Crumb Muffins

I was having a major craving for some Blueberry Muffins the other day. I have to be honest when I say, that unless they have been store bought or made from a package I had never made blueberry muffins from scratch before, until now. And I will NEVER go back! These muffins are so moist, and yummy I could eat the whole batch! Which i pretty much did! I should probably stop baking if I want to even step foot into a swim-suit this year! Lets, be honest though, that's probably not gonna happen!  Anyways, on to the recipe!

Recipe:
2 cups Frozen Blueberries (you can use fresh if you have them on hand)
1 1/8 cup & 1 Tbsp. granulated sugar
2 large eggs
4 Tbsp. Butter (melted and slightly cooled)
1/4 cup Veg. Oil
1 cup Buttermilk
1 1/2 tsp. Vanilla
2 1/2 cups Flour
2 1/2 tsp. Baking Powder
1 tsp. Salt

Crumb Topping:
3/4 cup flour
1/4 cup sugar
1/4 cup brown sugar
6 Tbsp. chilled Butter
pinch of salt

Take 1 cup frozen blueberries and rinse in cold water then lay on paper towels to dry. Take the remaining 1 cup frozen berries and 1 Tbsp. sugar and mash over low-med. heat in a small saucepan, stirring for about 5-6 minutes.  Set aside and let cool for 10 minutes.
In a large bowl, whisk together the sugar and eggs. Whisk in melted butter and oil. Then whisk in buttermilk and vanilla.
Combine the flour, salt, baking powder, and berries and fold into the wet ingredients. Don't over mix or else the muffins will come out a little dry.
Pour into lined muffin tins and top with 1 Tbsp. Crumb Topping. (For the topping mix all ing. together and cut in the chilled butter with either a fork or a pastry blender)  Bake @ *375 for 16-18 minutes just till the tops of the muffins look firm.  Enjoy!

(Recipe adapted from Melanie @ Mels Kitchen Cafe)

Monday, February 28, 2011

Zucchini Bread

Ever since I can remember this has been one of my very favorite breads! My mom made it a lot while we were growing up, and I can remember so vividly, walking in the door from school and smelling the bread baking and get so excited. It makes your house smell so lovely that its almost worth baking for the smell alone!

Recipe:
2 cups zucchini (shredded) (about 3 medium zucchinis)
1 cup vegetable oil
3 eggs
1 tsp. vanilla
3 cups flour
2 1/4 cups granulated sugar
1 tsp. salt
1/2 tsp. baking powder
1 tsp. baking soda
3 tsp. cinnamon
1/2 cups walnuts (chopped) (optional)

Topping:
1/2 tsp. cinnamon
4 Tbsp. granulated sugar

Shred the zucchini then lay it on paper towels to absorb most of the liquid from the zucchini's. Next in a large bowl (or in your mixer) mix together eggs, oil, vanilla, and zucchini. In a seperate bowl, mix together all the dry ingredients then slowly add in to the wet ingredients. Add nuts at this point if desired.
Lightly grease 2 loaf pans and pour batter in about 1/2 way full. Top off by sprinkling cinnamon and sugar mixture over the top. Bake @ *350 for 50 minutes-1 hour. Check with a toothpick or knife and when it comes out clean these babies are done! This bread is great warm with a little butter on top or I personally love it when it has cooled and the flavors are more strong! I hope you enjoy this as much as our family has!
Related Posts Plugin for WordPress, Blogger...